Drip emails are one of the main ways to effectively communicate and share valuable information with your prospective clients, current clients, and past clients. This marketing strategy allows you to nurture relationships by delivering relevant content over time, ensuring that your audience remains engaged and informed. By setting up your emails on a predetermined schedule, you can automate the delivery process, saving you time and effort while maintaining consistent outreach.
This systematic approach not only helps in promoting your services or products but also assists in building trust and rapport with your audience. Whether you aim to educate your clients about new offerings, share important updates, or guide them through a sales funnel, drip emails provide a structured way to convey your message while allowing recipients to receive information at a steady pace that suits their needs.
To begin setting up your drip campaign, follow these steps:
Step 1: Log in to your myTRIBUS account.
Step 2: In the left-hand side menu, click on the "Marketing" option.
Step 3: From the marketing options, choose "Drip Marketing" to access the drip dashboard.
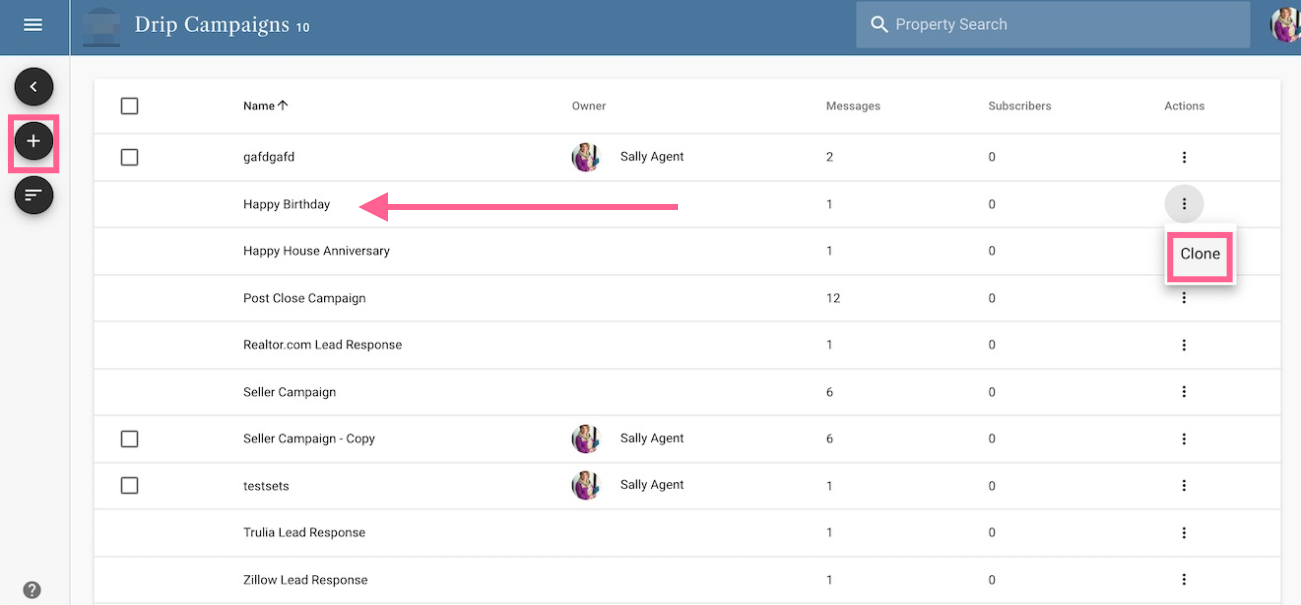
You will then be taken to the drip dashboard where you will see blast templates as well as your own (if you've created any previously).
From here you can:
- Select the "+" sign icon to create your own custom drip
- Select the 3 dots under actions to clone a pre-built template
Once you have cloned a template, you will see the template now has "copy" next to its name. You will click on the copy to begin setting up your drip campaign.
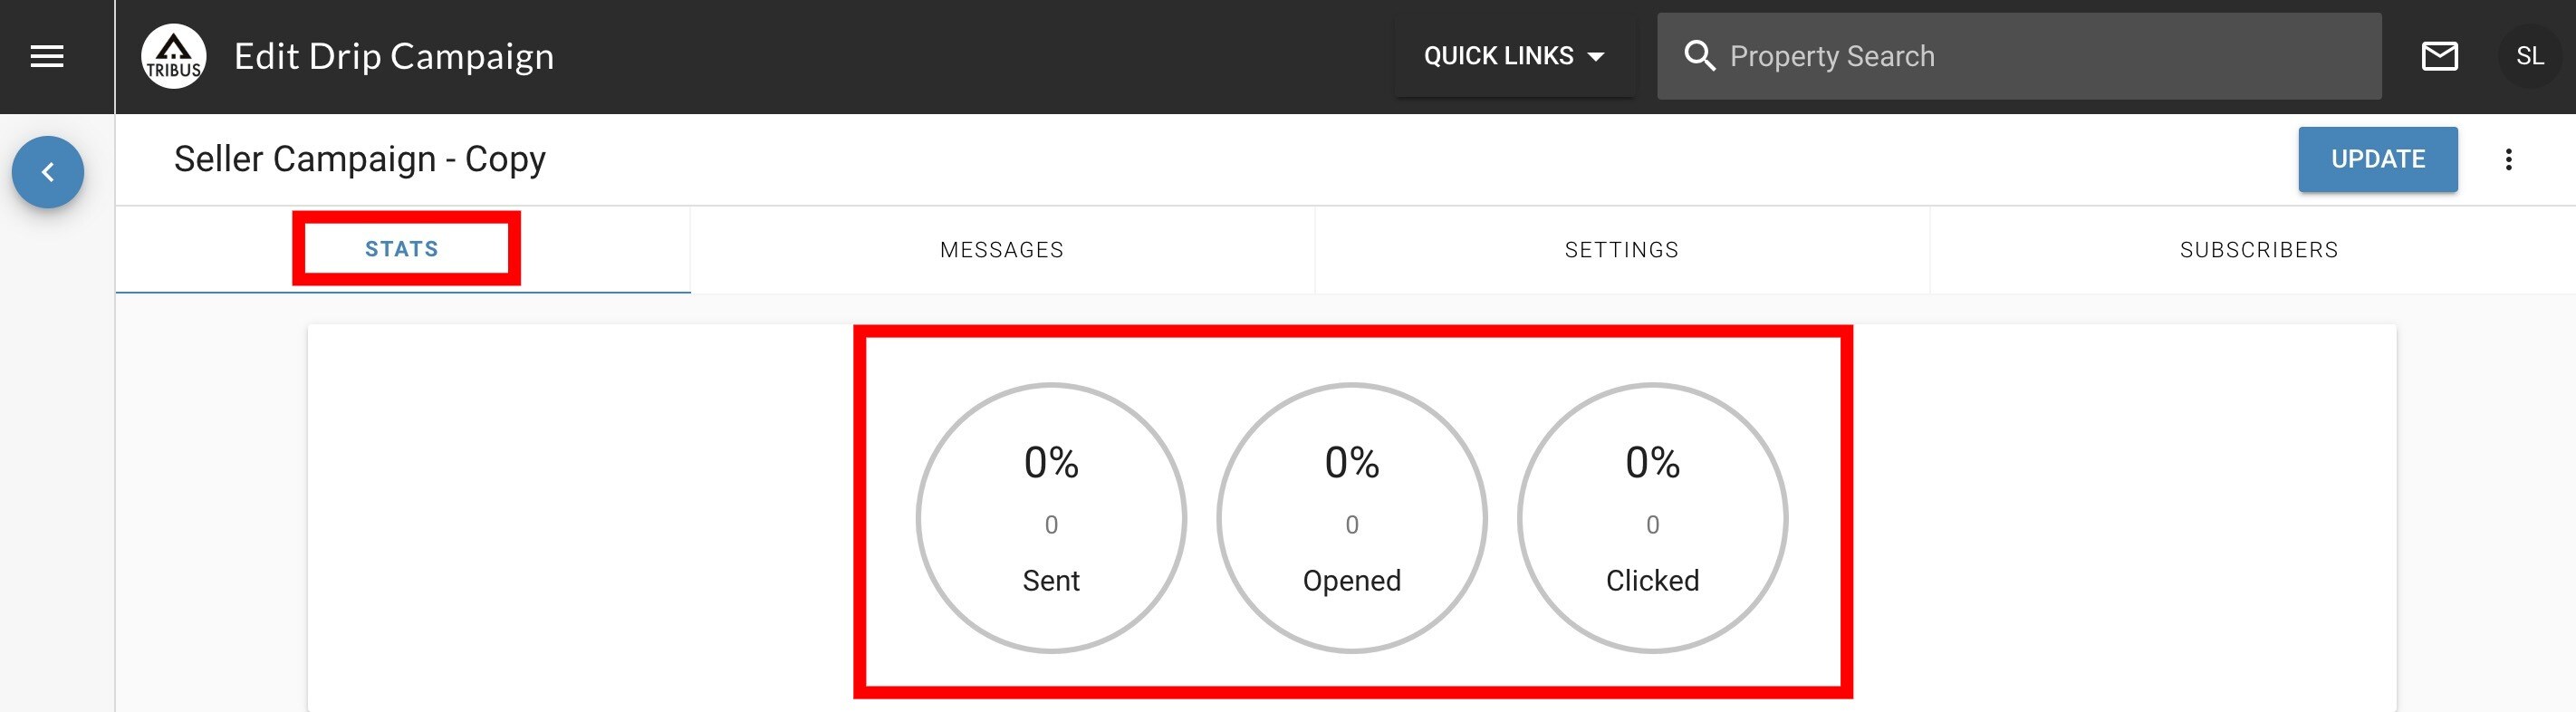
The first tab will show you overall statistics for your drip campaign. This will let you know:
- What percentage of contacts had the email sent to them
- What percentage of contacts opened the email
- What percentage of contacts clicked on any links in the email
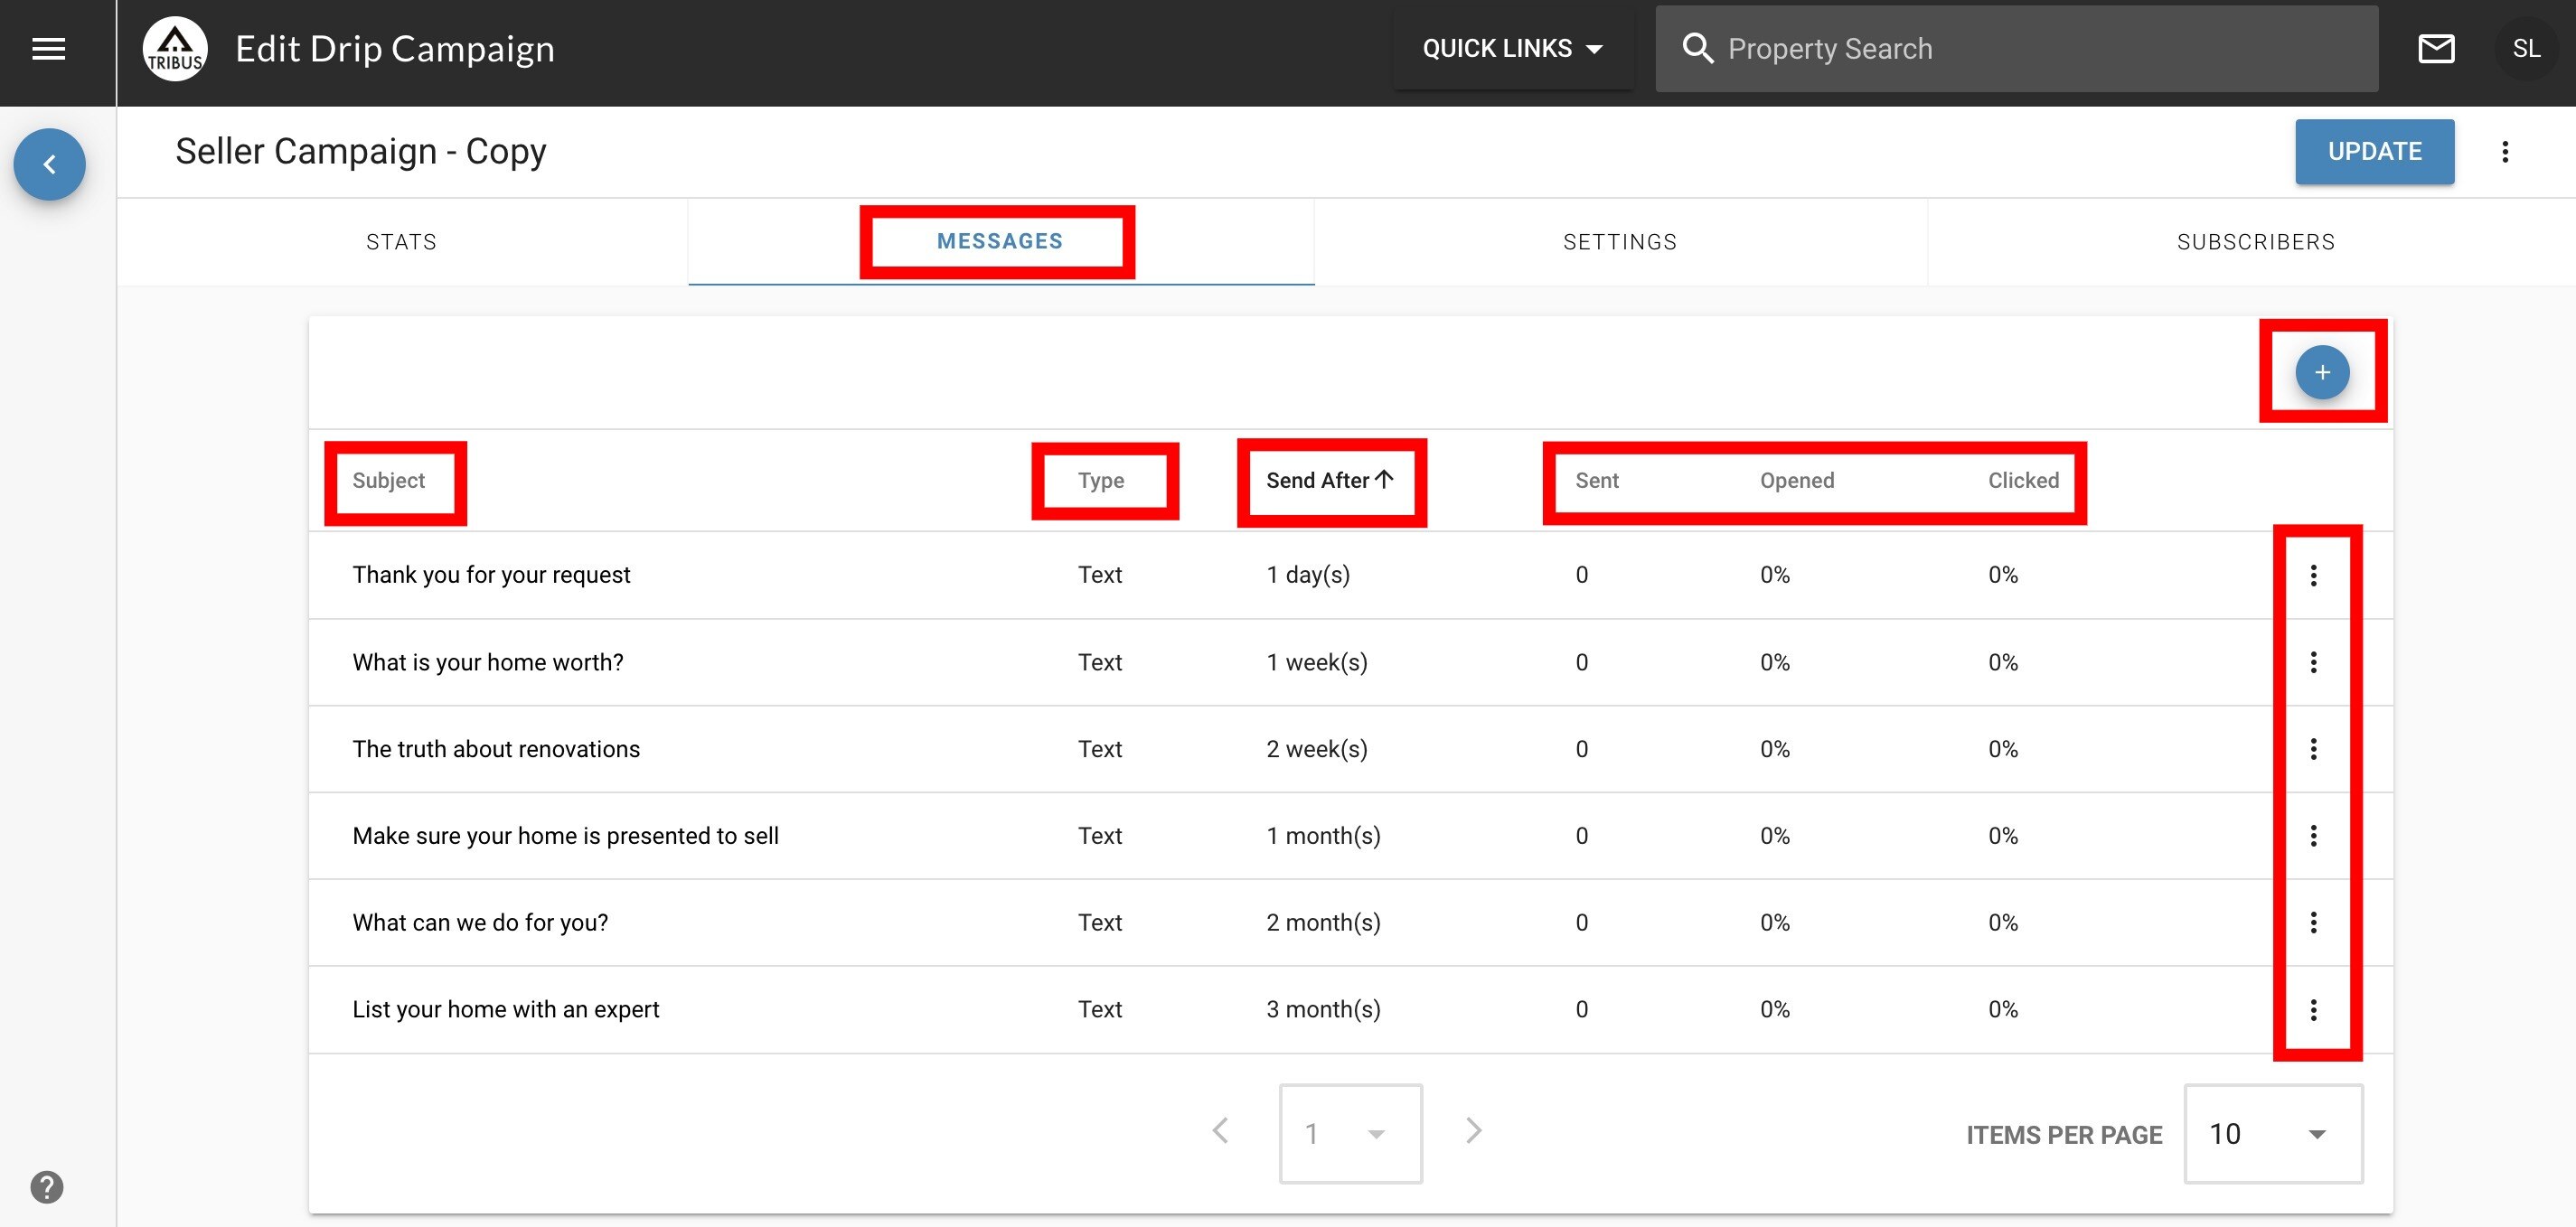
Next you will go to the "messages" tab. This will allow you to:
- View the messages under the subject column
- See the type of email (text or rich) under the type column
- See the schedule for the messages under the send after column
- See statistics for the messages under the sent, opened, and clicked columns
- Add additional messages with the "+" sign
- Edit or delete messages using the 3 dots to the right of the messages
Text type emails are simple emails that consist solely of plain text without any formatting, images, or interactive elements. They are straightforward, making them easy to read and quick to load, which can be beneficial for recipients who prefer a minimalist approach or have limited internet connectivity. On the other hand, rich type emails are designed using a rich text editor and can include a variety of multimedia elements such as images, buttons, and styled text. This allows you to create visually appealing and engaging content that can capture the attention of your audience more effectively. Rich emails can incorporate call-to-action buttons, links, and formatting options like bold or italic text, which can enhance the user experience and encourage recipients to take specific actions, such as visiting your website or signing up for a service. When choosing between text and rich type emails, consider your audience's preferences and the message you wish to convey.
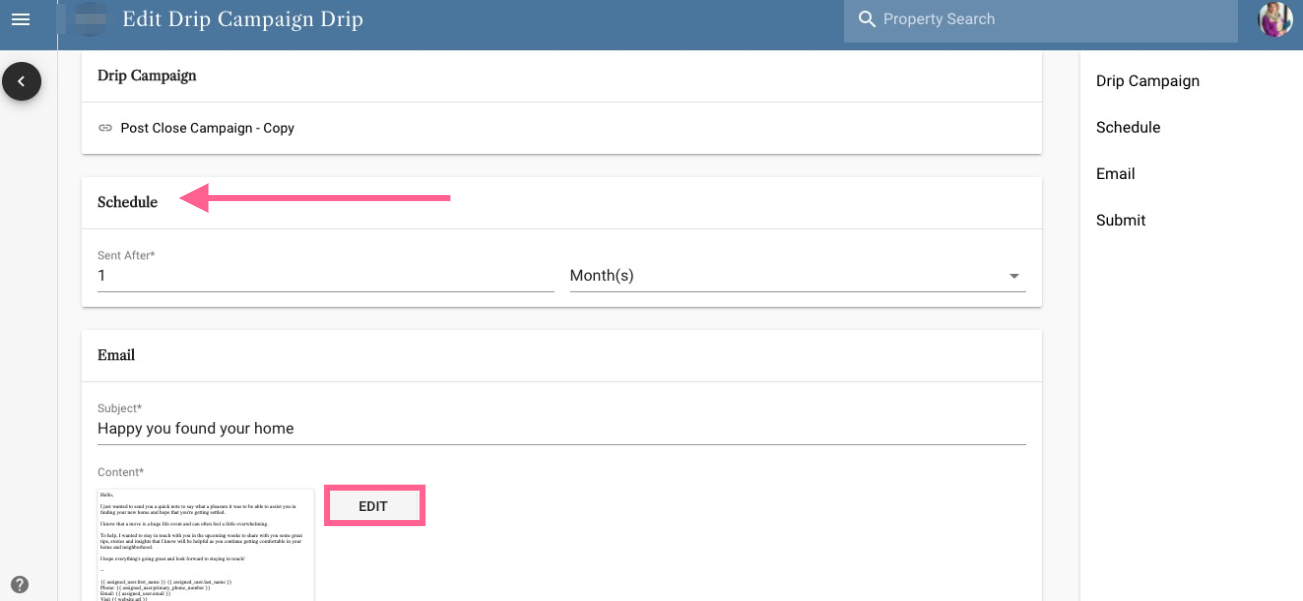
If you decide to edit the message and its schedule, then you will be taken to the editor where you can alter the schedule or email itself. You will make sure to click "update" at the bottom to save your changes.
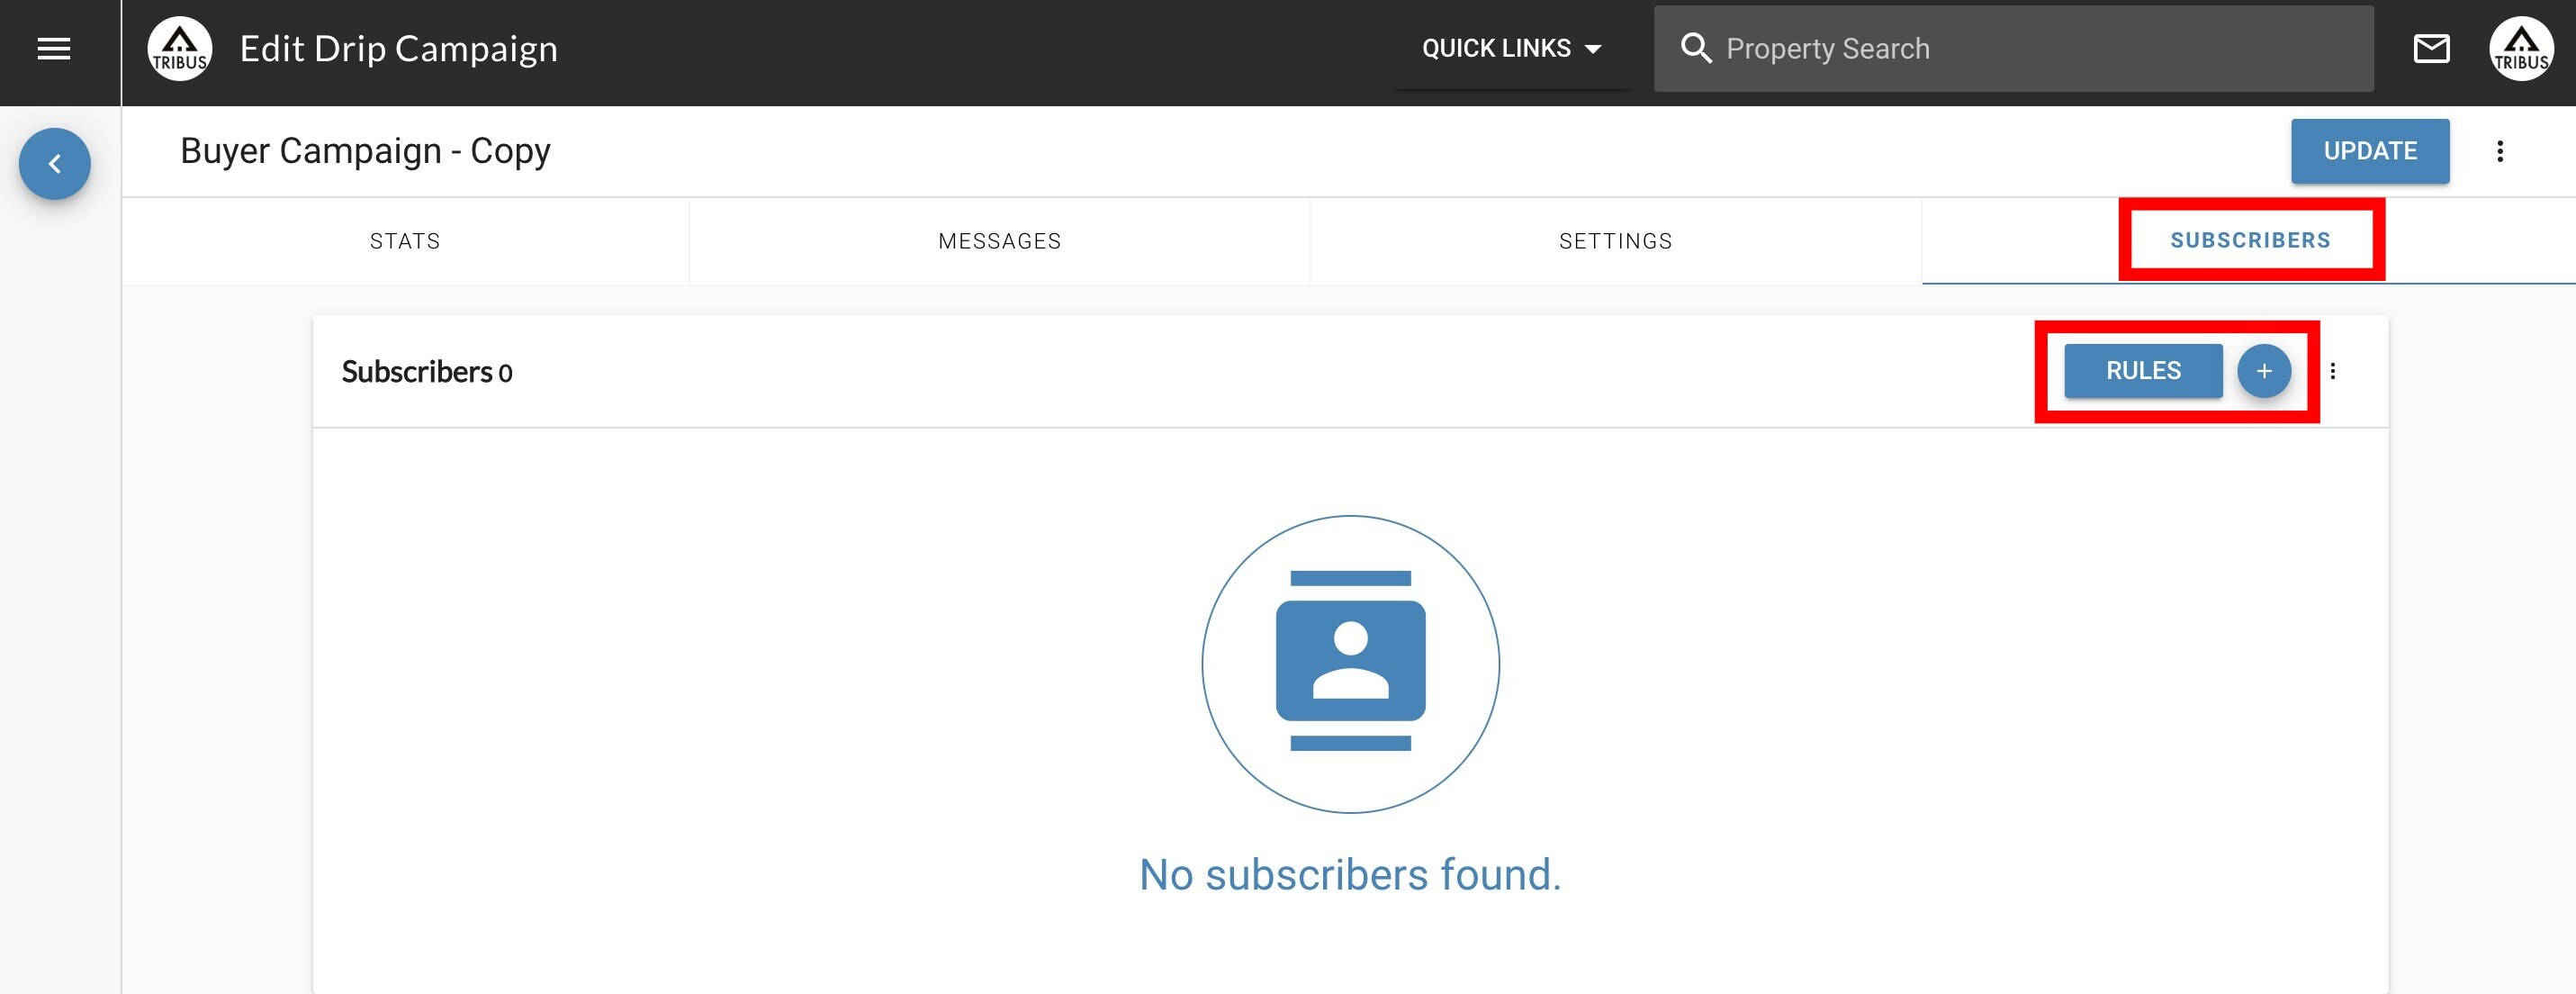
Once you are finished with editing your messages and their schedule, you can then add your contacts you would like to set up on the drip campaigns by going to the "subscribers" tab.
You can then:
- Add individual contacts with the "+" sign icon
- Add multiple contacts with the "rules" button
With the "+" sign you can type in the person's name and then add them.
With the "rules" button you will enable them and then select the "+" sign to add the tags to be pulled in like below.
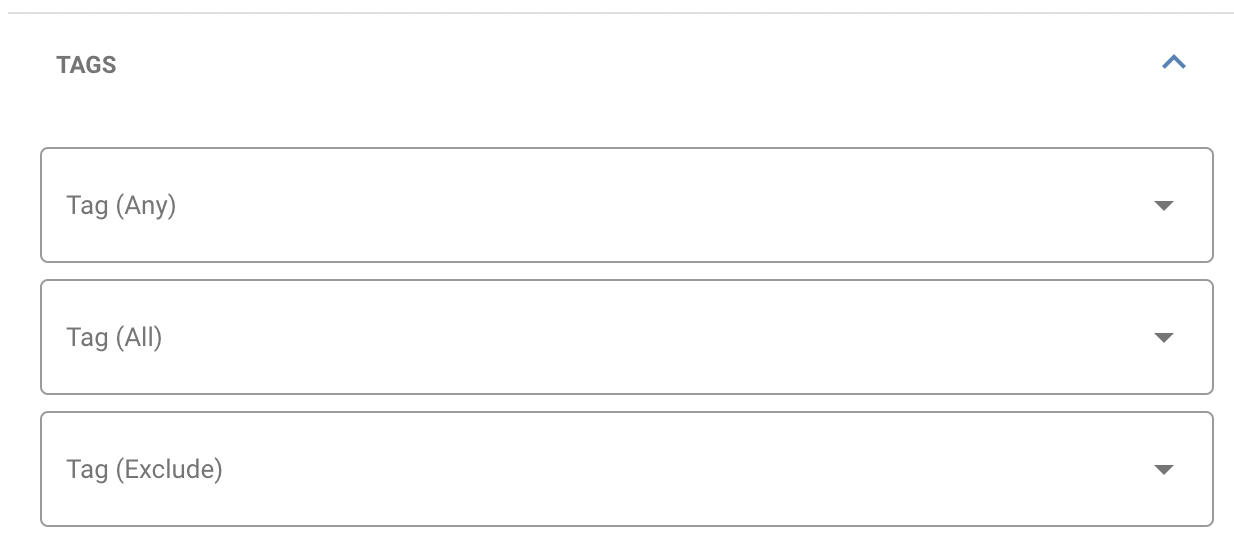
Tags (Any): Pull in any of the tags selected
Tags (All): Pull in all of the tags selected
Tags (Exclude): Pull in every tag except the one(s) selected
Click apply once finished and it will pull in the respective contacts selected.
Once you are finished with adding your contacts, then you will click the "update" button in the upper right-hand corner to start sending out the drips.
Note: You can add contacts to your drip campaigns at any time, which provides flexibility in how you manage your outreach efforts. When you add a new contact, they will always begin receiving emails from the start of the drip campaign, starting with the first message. This means that regardless of when they are added, they will not miss any critical information, as they will progress through the scheduled emails in the order they were intended.
It's important to understand that the schedule operates on a sequential basis. For example, if your drip campaign is set to send emails every month, a new contact added in the middle of the campaign will begin with the first email and continue receiving subsequent emails at one-month intervals. Thus, if your campaign includes messages scheduled for 1 month, 2 months, and 3 months, the new contact will receive the first email immediately upon being added, followed by the second email one month later, and the third email one month after that. This structured approach ensures that all recipients receive the information in a timely manner, fostering better engagement and a clearer understanding of your offerings.