Blast templates are essential tools designed to streamline the process of creating marketing communications that are sent out to a large audience. These templates allow users to efficiently craft visually appealing and informative emails for promotional campaigns, newsletters, and announcements. By utilizing blast templates, marketers can ensure consistency in branding and messaging, while saving time on design and layout. The templates can be customized to include various elements such as images, text, and call-to-action buttons, making them versatile for different marketing needs. This capability enhances engagement with recipients and increases the likelihood of achieving desired marketing outcomes.
Step 1: Login to myTRIBUS.
Step 2: Select "marketing" on the left-hand side menu.
Step 3: Select "blast templates"
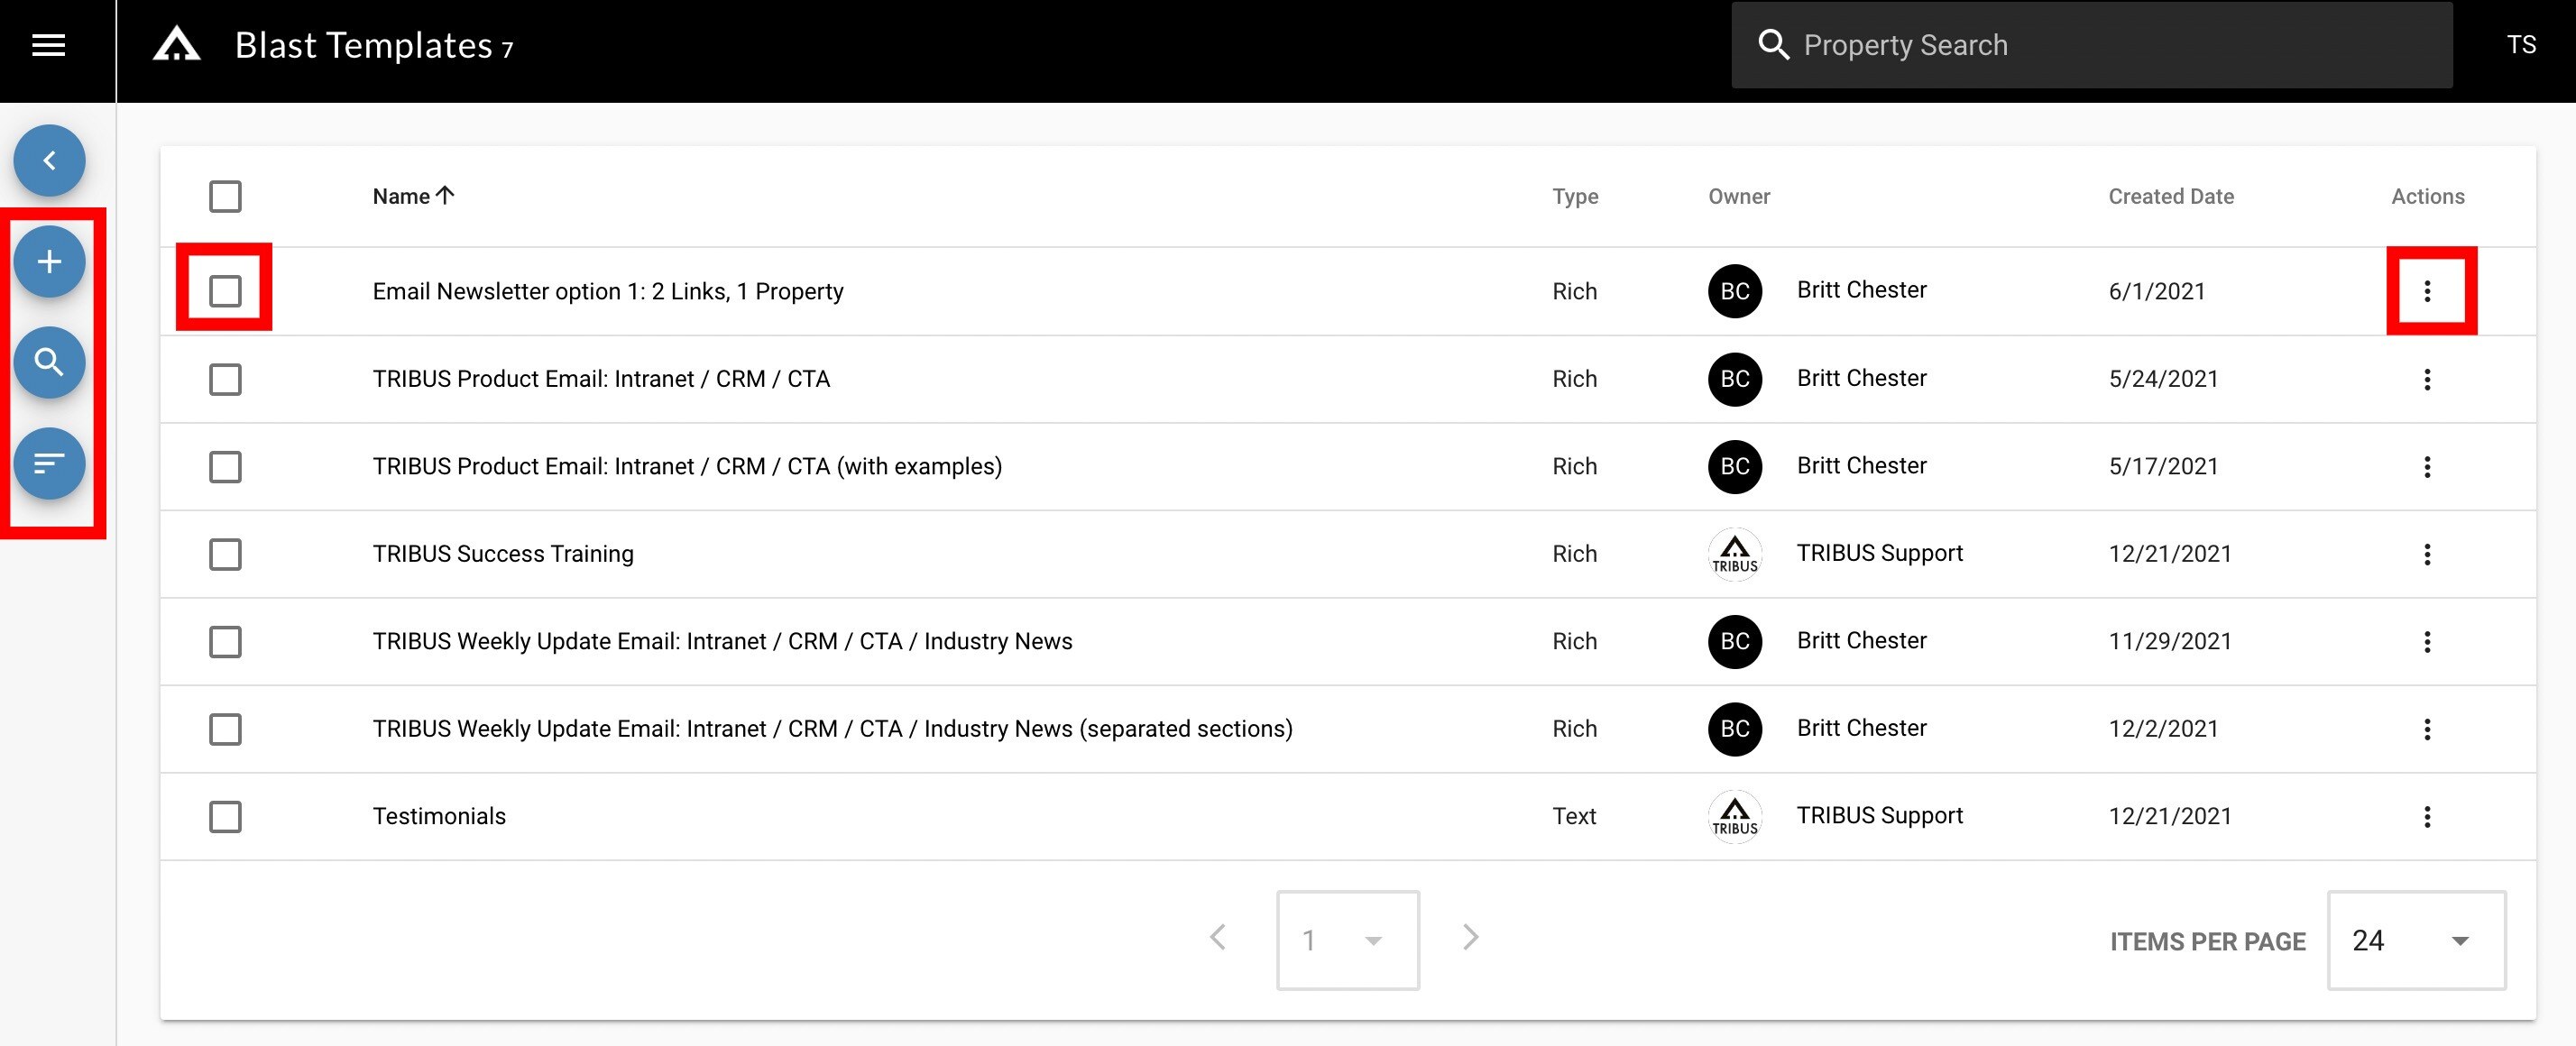
From here you can:
- Create new templates with the "+" sign
- Search through templates with the magnifying glass
- Change the page settings with the bar graph icon
- Select a checkbox to delete a template
- Select the three dots under "actions" to clone a template
Step 4: Select the "+" sign to create a new template.
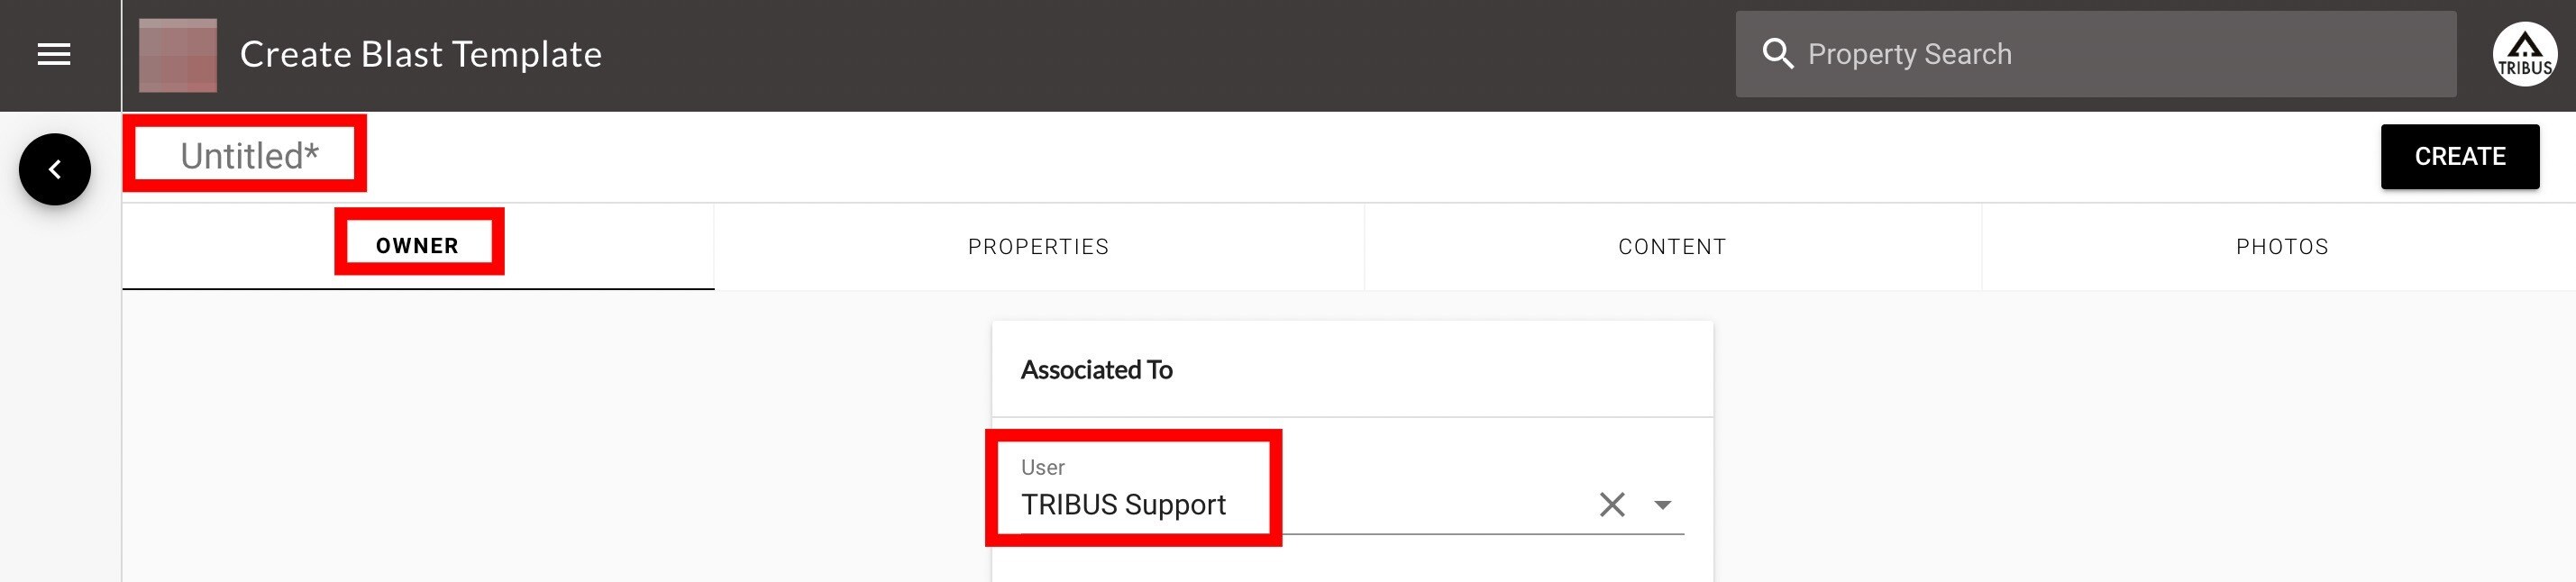
Step 5: Title the template
Step 6: Decide on the owner of the template (who should have access to the template)
Note: If you would like to give access to the template to everyone, then you can leave this section blank.
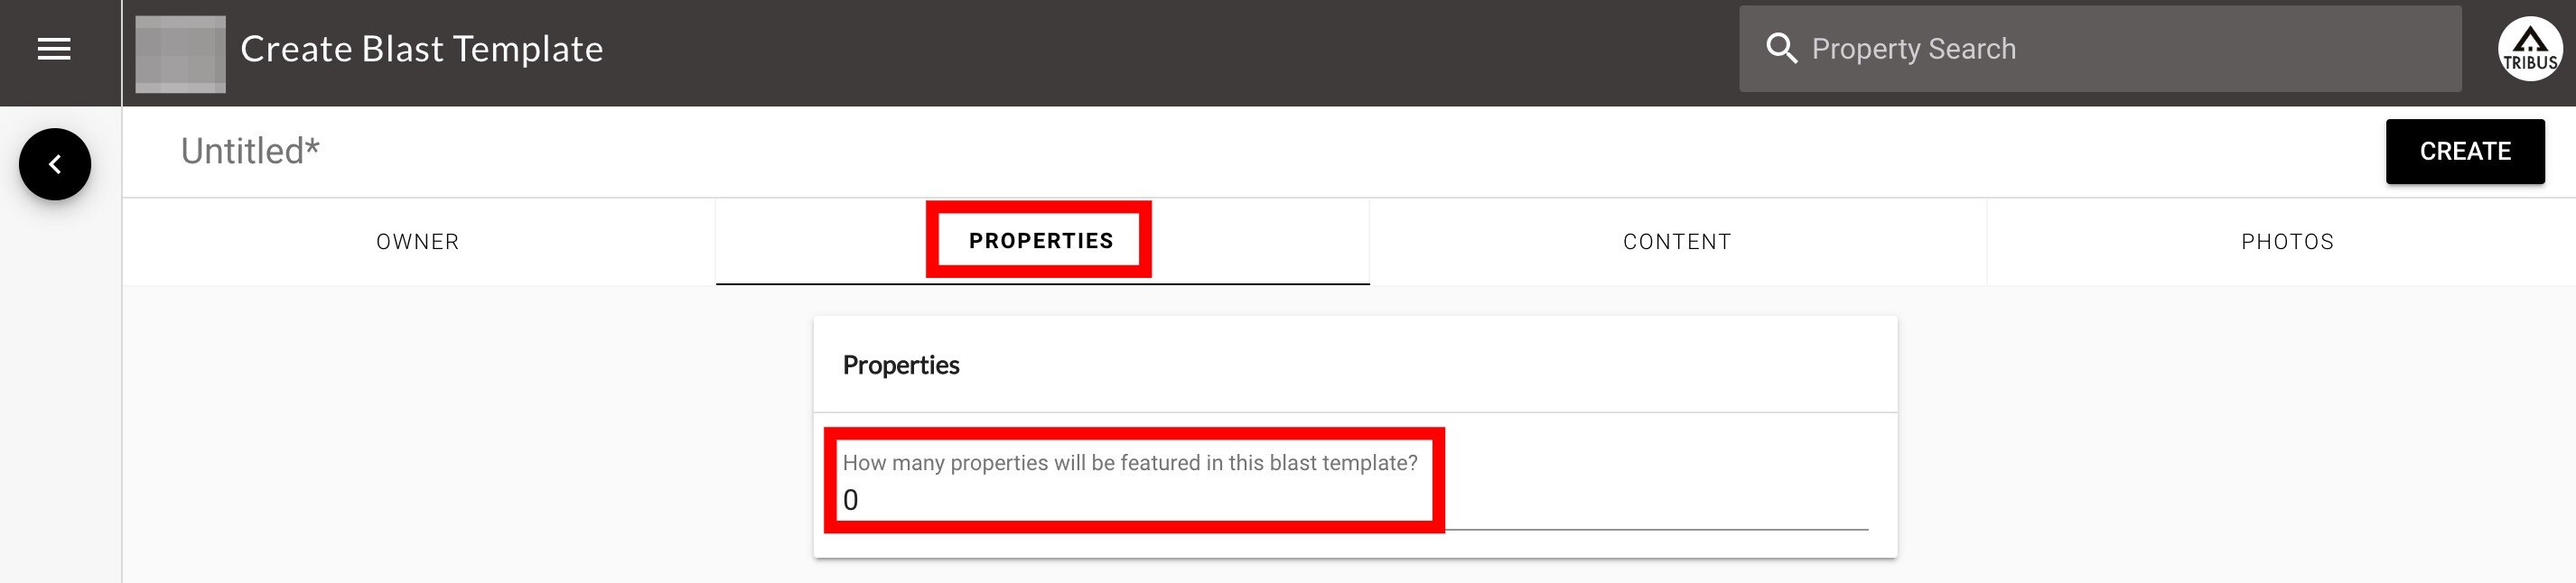
Step 7: Decide how many properties you would like to add to the template
Note: If you leave this blank, then there will be no option to add properties in the blast template.
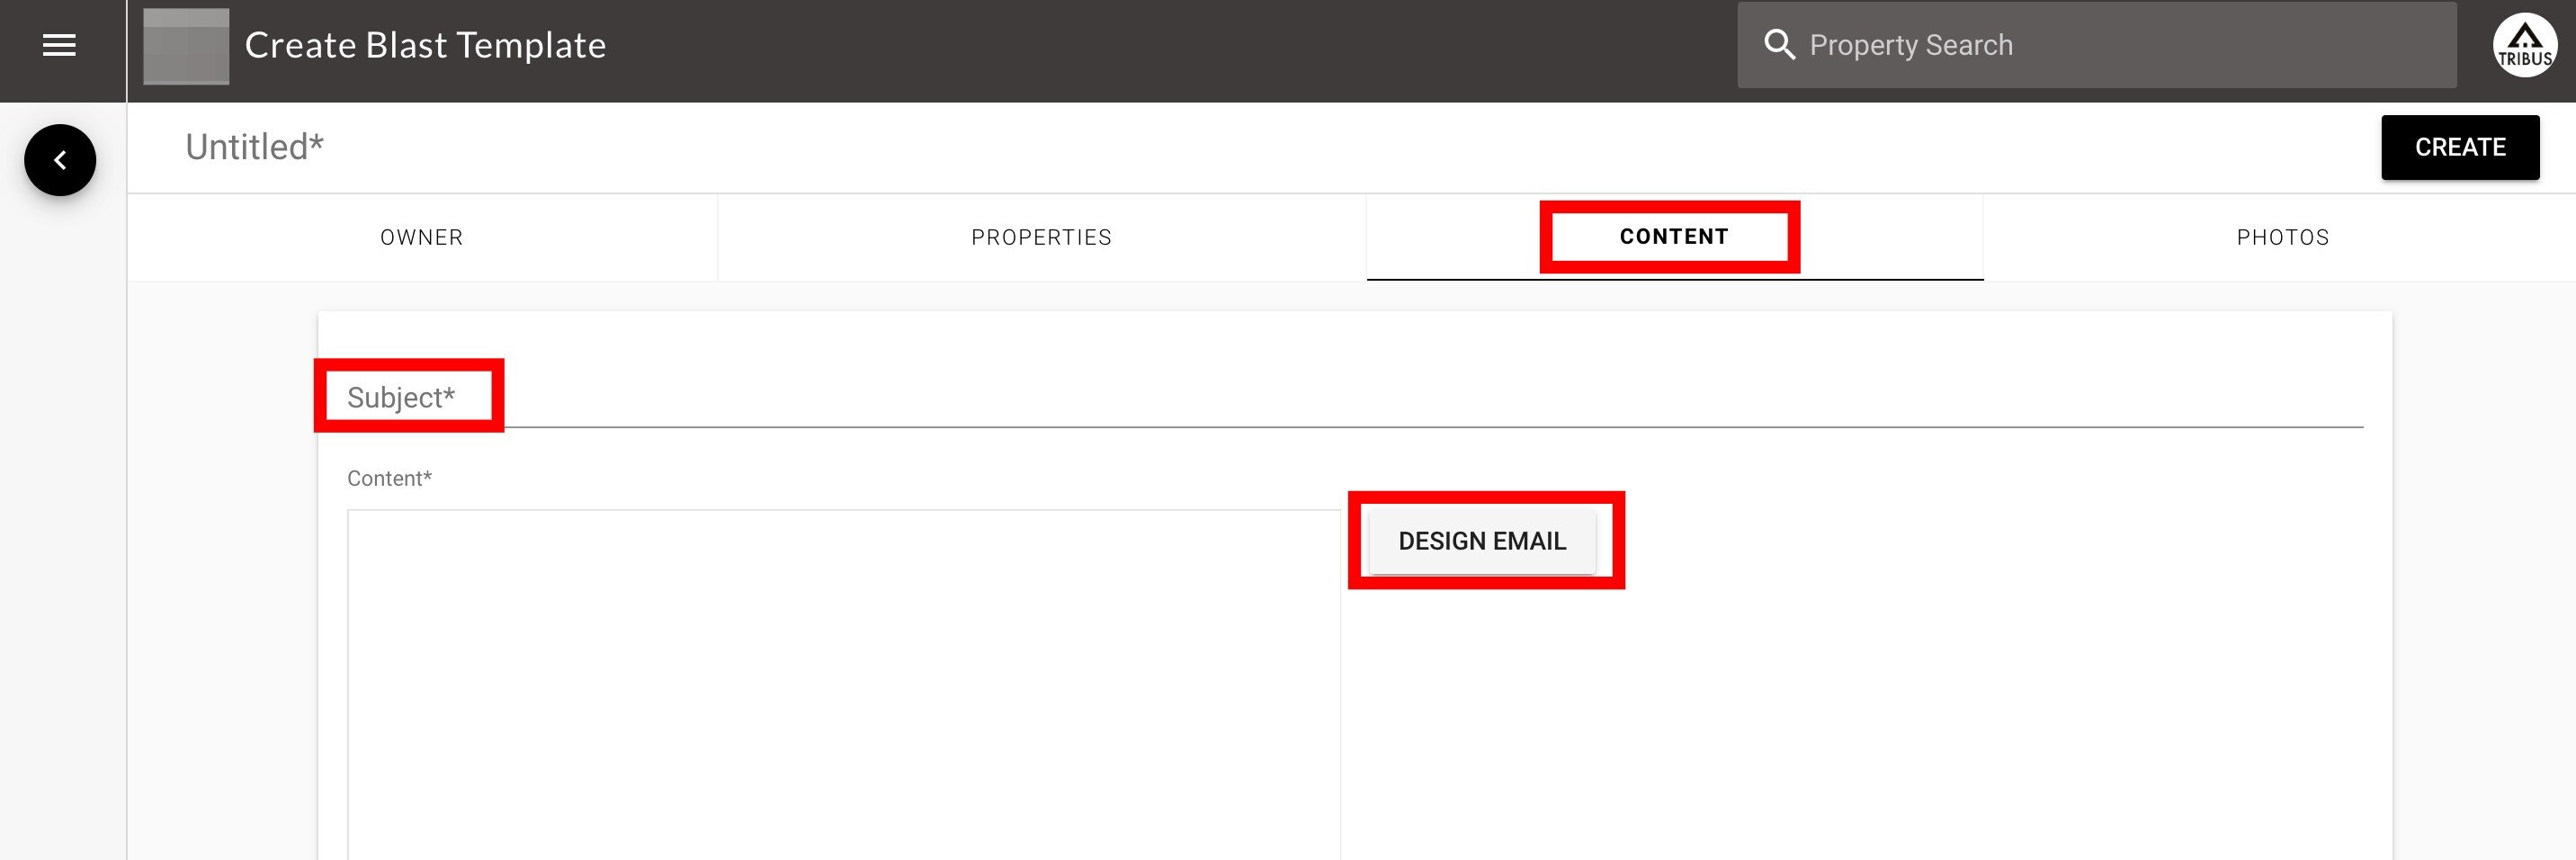
Step 8: Decide on the subject of the email
Step 9: Design the email template

Step 10: You will decide between creating a rich or text email template
Note: Rich is using the editor with picture, buttons, and text. The text option is written text only.
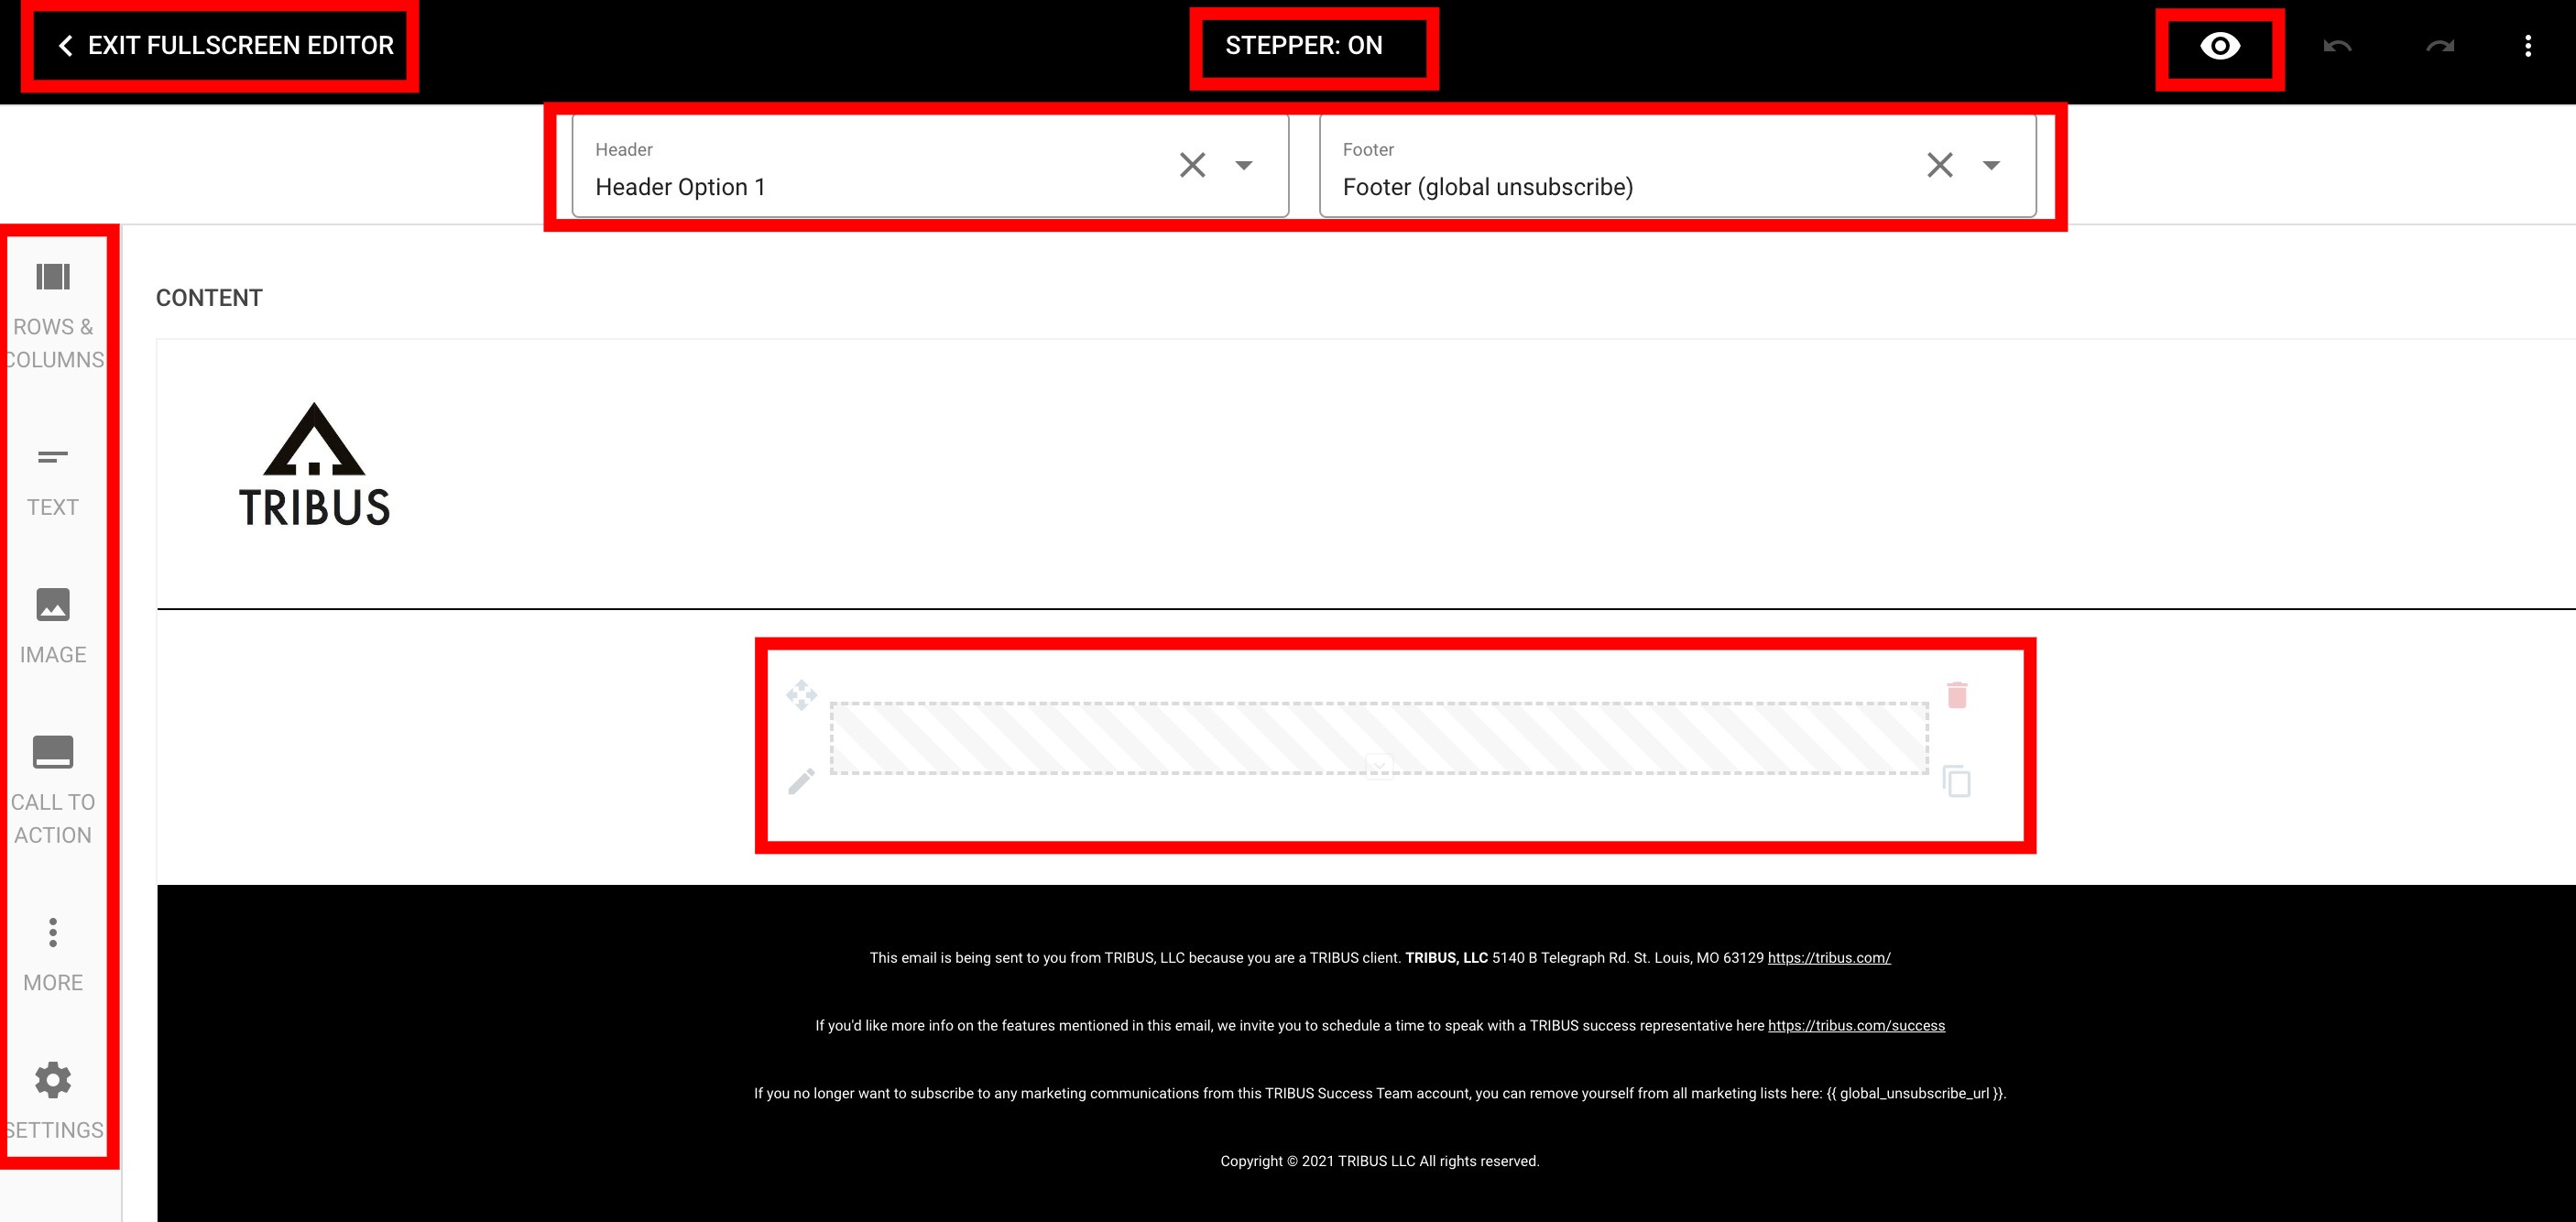
How to Use This Editor
At this point, you have several options to personalize your content in a variety of ways.
Layout and Content Tools
Rows & Columns: Add different layout designs for your content.
Text: Add headings or text boxes.
Image: Upload images from various sources, including:
- Your local device
- The Multiple Listing Service (MLS)
- Your personal headshot
- A web link (URL)
Call to Action: Include a button that can be linked to a specific URL.
More: Add extra elements like:
- Spacers
- Dividers
- HTML code
Styling and Settings
Settings:
- Change colors
- Fonts
- Font Color
- Responsive
- Width
Stepper: Turn it on/off to make styles or content editable for others.
When the stepper is on, content is locked. You can then go to each section and select to unlock Style or Content.
- Style Editable - This allows users to edit the color, font and other visual aspects
- Content Editable - This allows users to edit the text images and links
Headers and Footers
- Choose from different header and footer styles to suit your template.
Editing Content In a Section

The red section indicates a row, inside of this row can be multiple sections.
Add Content: Click inside the gray rectangle to start adding content.
Move Content: Use the directional arrow in the upper-left corner of any content block to drag and reposition it.
Delete Sections: Click the red “X” or trash can icon in the upper-right corner of a Section
Delete Rows: Click the red trash can icon in the upper-right corner of the Row, This will delete all Sections in this Row as well.
Copy Rows or Sections: Use the double-paper icon in the lower-right corner of a section to duplicate it.
Edit Sections or Rows: Click the pencil icon in the lower-left corner of a section to edit.
Preview and Save
- Preview: Click the eye icon in the top-right bar to see how the template looks.- Save: Select “Exit Fullscreen Editor” to save your template.
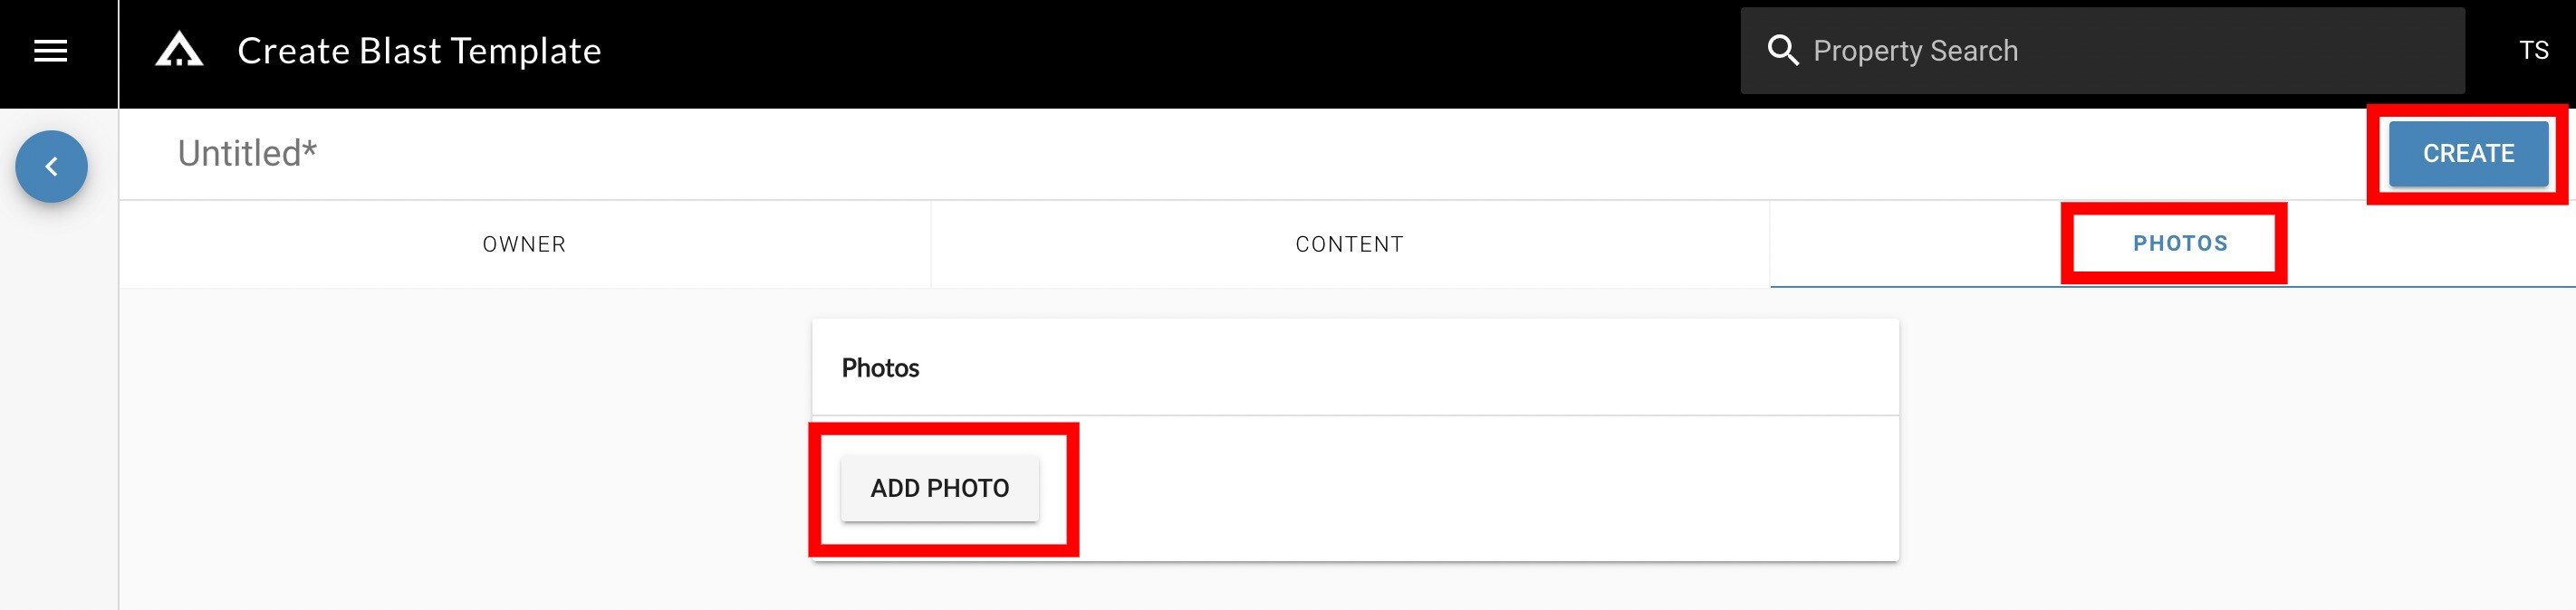
Step 11: Take a screenshot of the blast template and select "add photo" to add it to the template to have it display as a preview for when a person is under blast marketing and clicks the eye icon to preview the template
Step 12: Select "create" to complete the blast template
Note: After you click "create" you will notice that the blast template you created is now under "blast marketing" under the available templates once you choose the "+" sign.